We’ve seen a surge of investments in home improvements over the last few years that is expected to continue in the future. We’ve seen people reimagine and rework their spaces during the covid era as they spent more time at home. And, as the housing market has provided its own challenges, more and more homeowners are opting to find a way to improve the space they have. For some, that may mean putting on an addition to find more square footage. For others, who don’t want to lose functionality of their existing kitchens, or need to move out, or live in a construction zone, tapping into already existing square footage in their basement can be a goldmine.
We’ve taken lots of photos to document the process of this Total Basement Renovation project over the last year. You may have even seen some videos on our social media! Here is the ultimate recap, from start to finish.
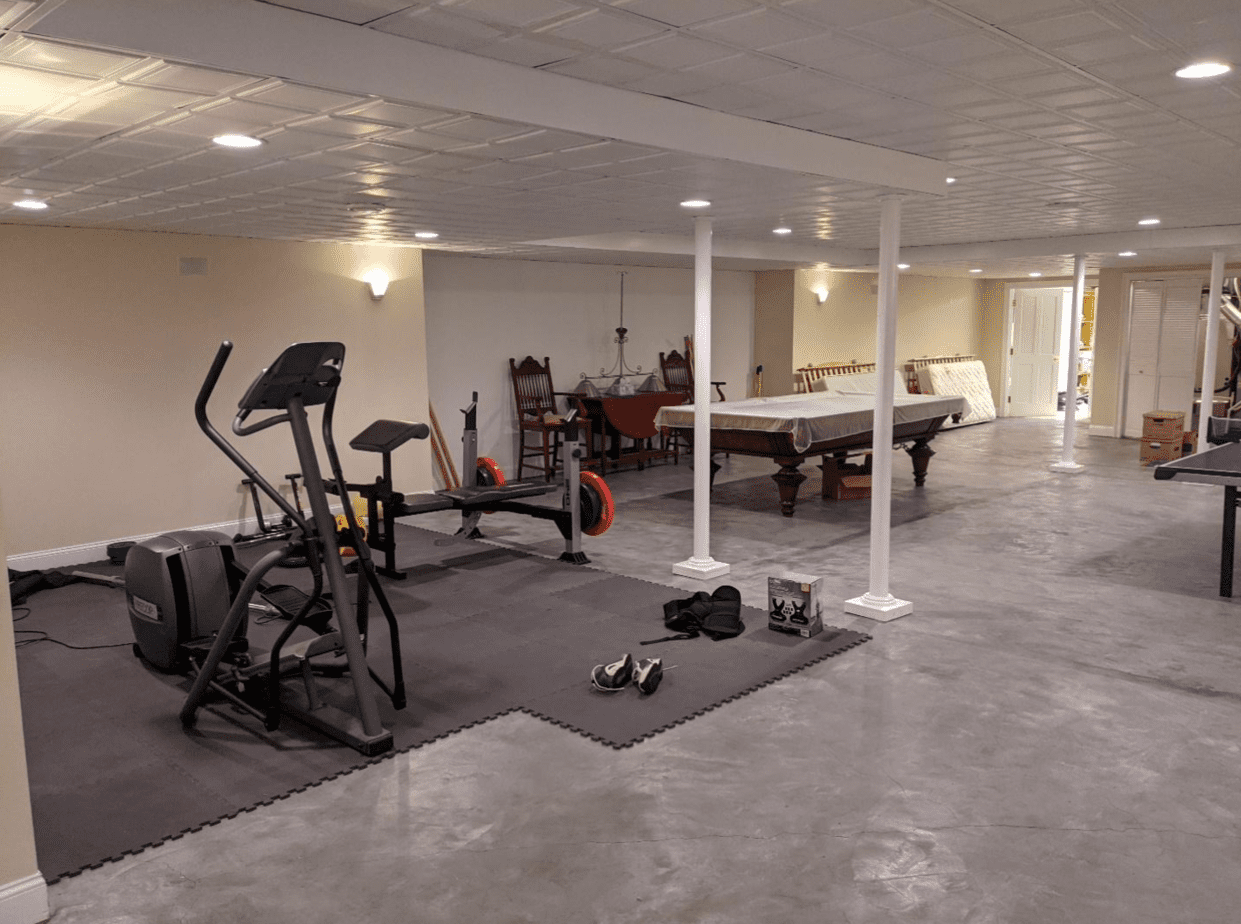
A view of the main space after walking down the stairs from the house. These 2 columns became an integral part of the new bar area.
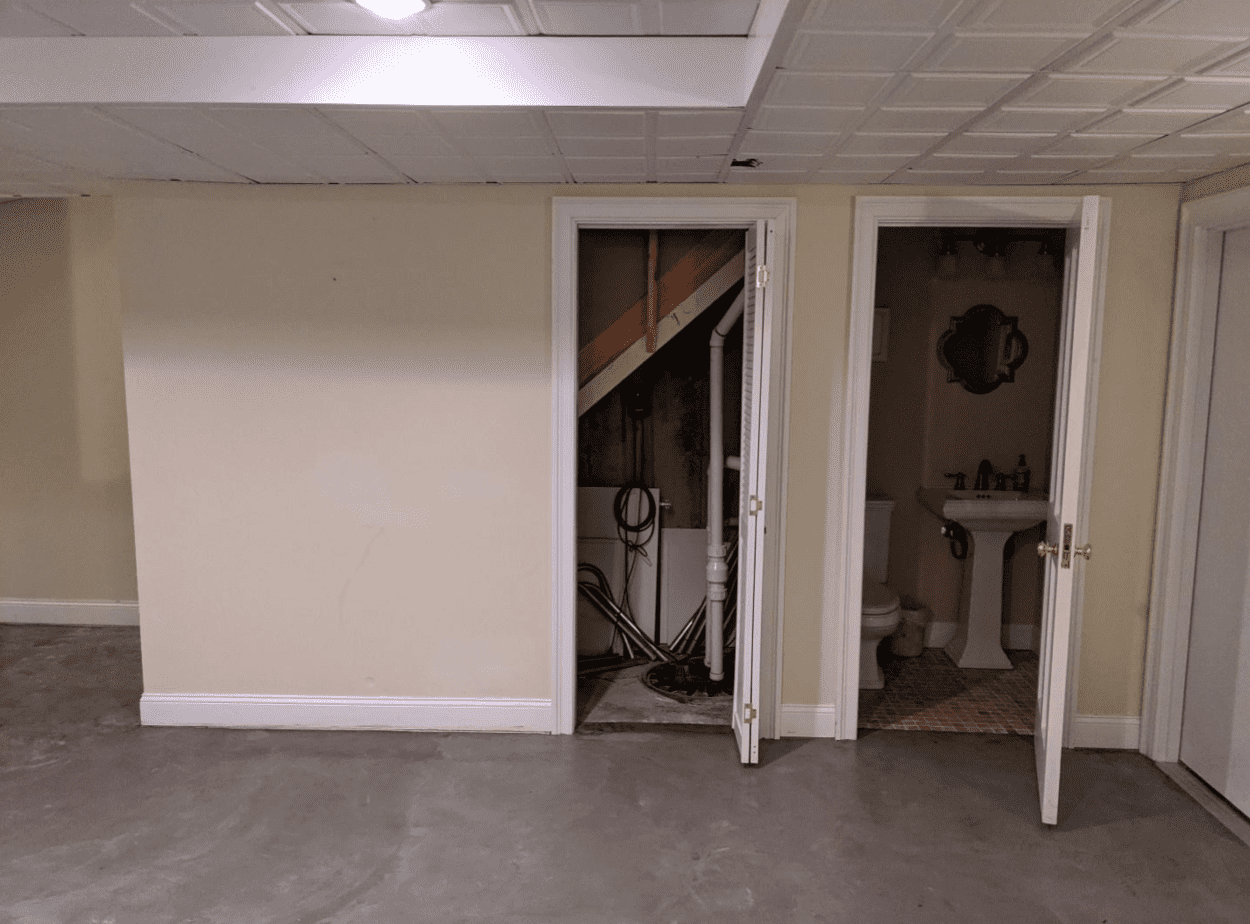
View of the stairs, underneath are an existing sump pump and the old half bath. In the back of the space, french doors lead back to a large storage space.
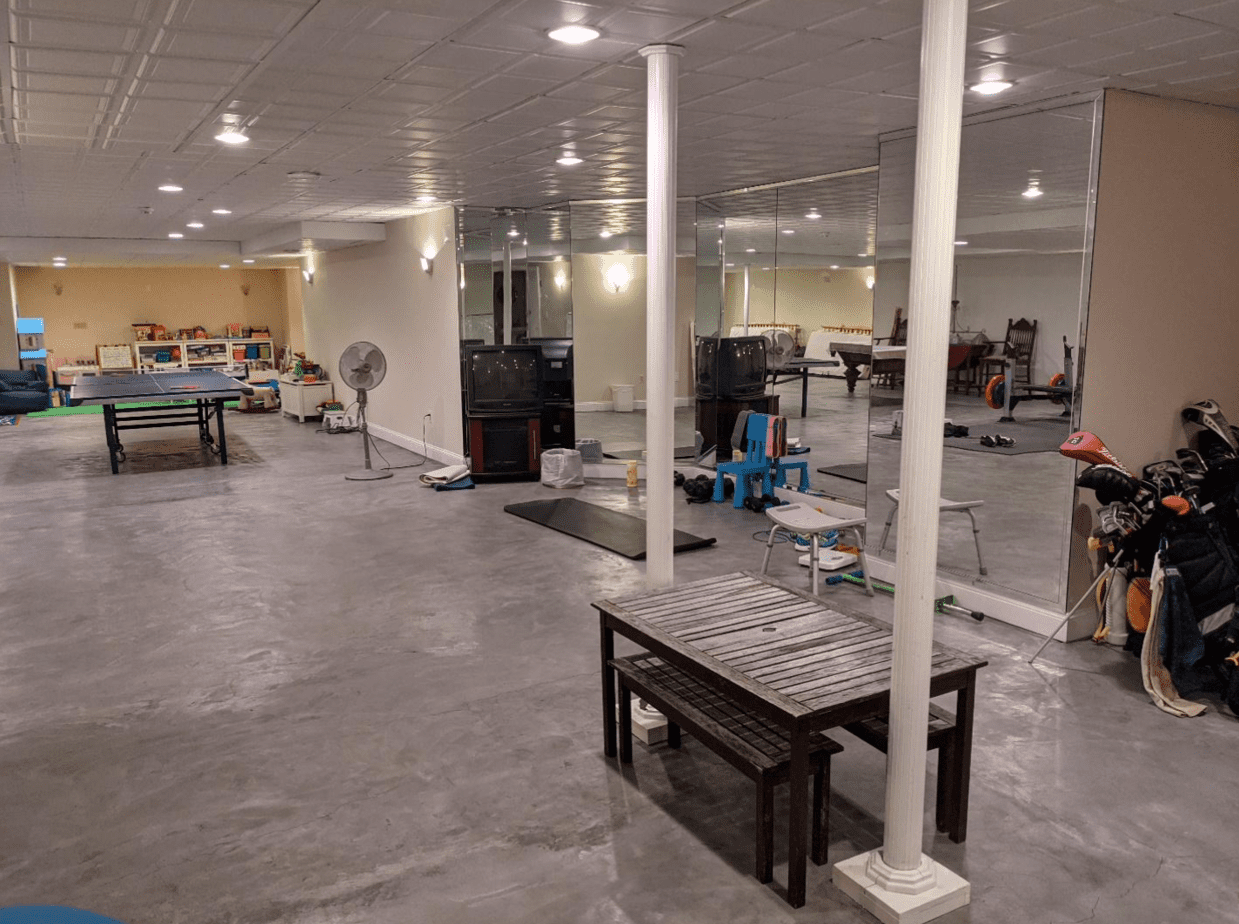
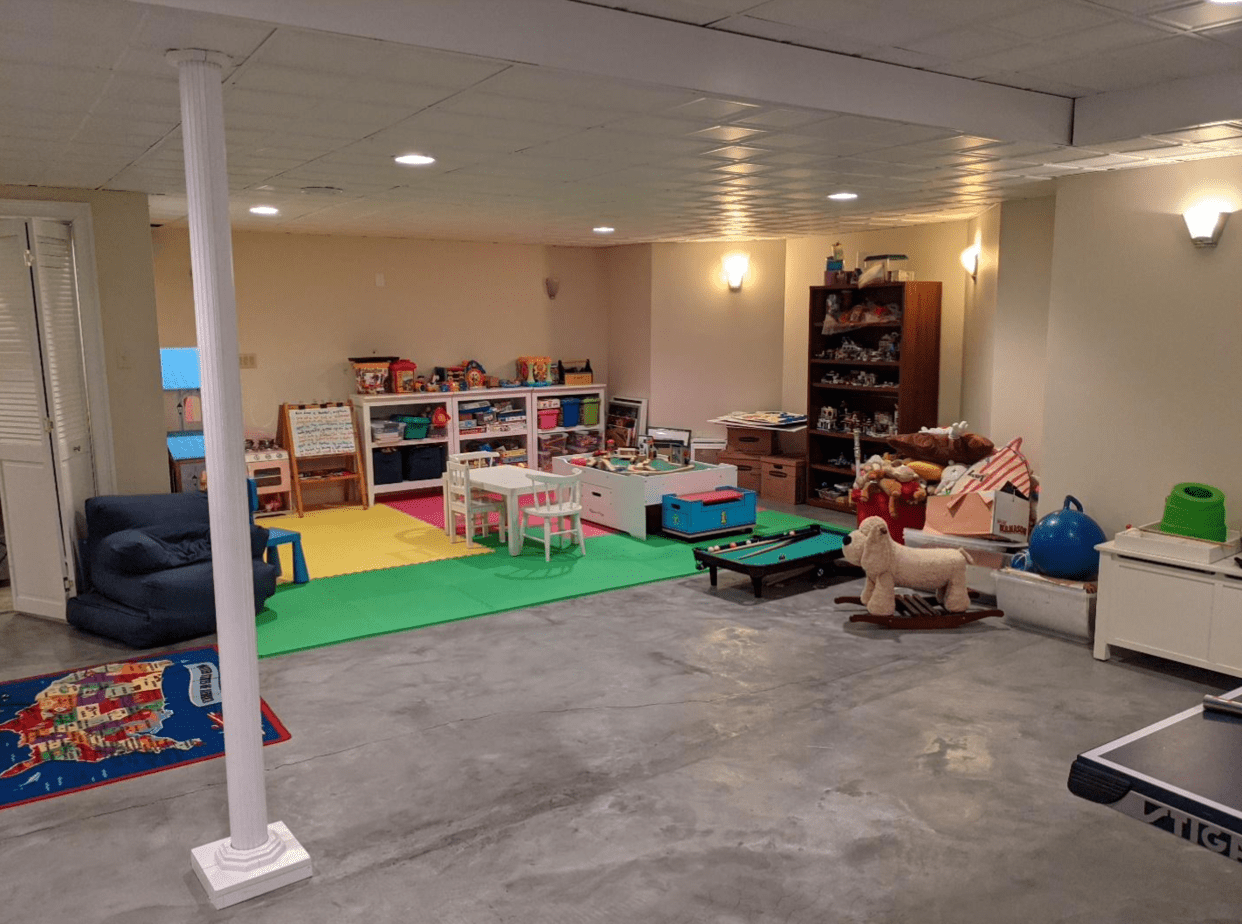
A graveyard of unused and outgrown toys took up a large part of the space.
Setting the Scene
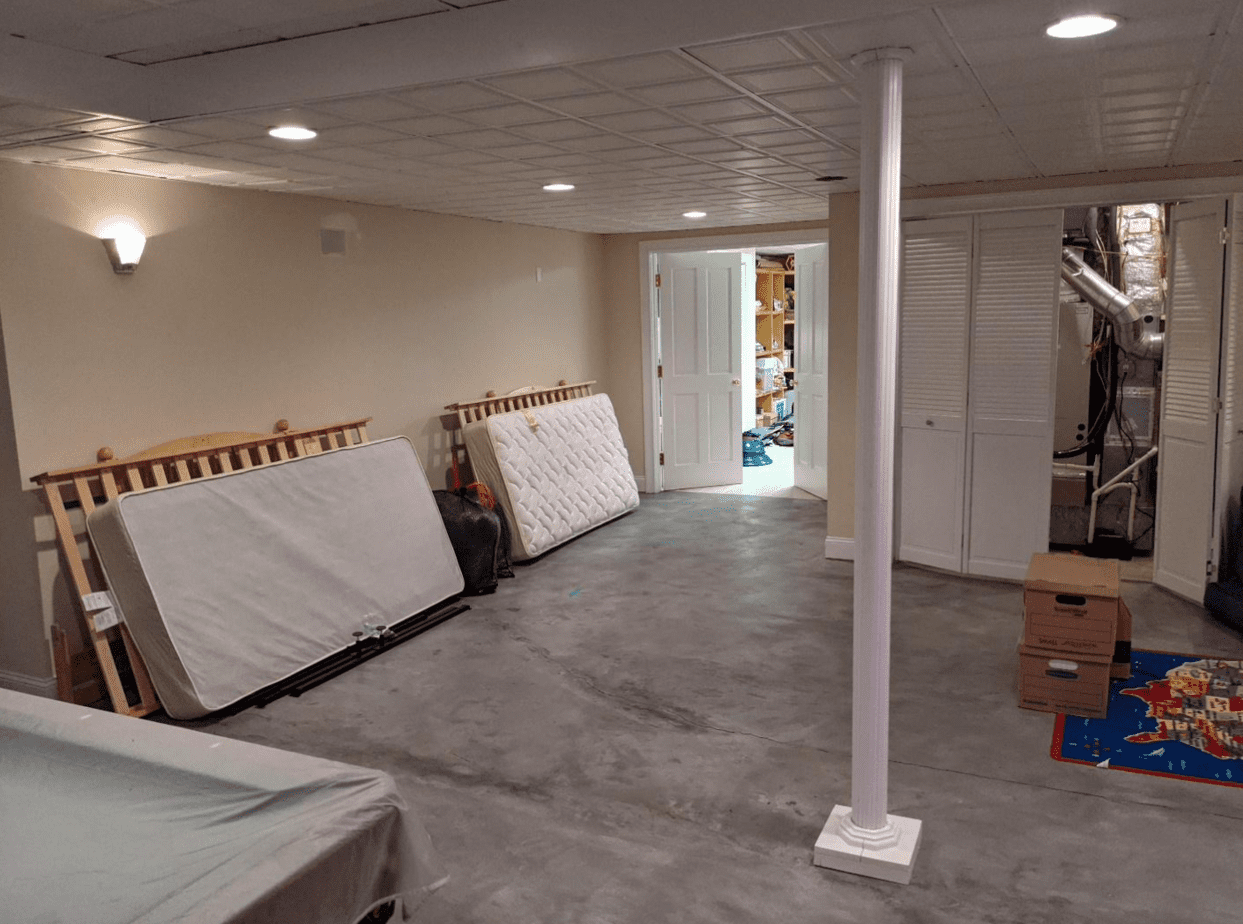
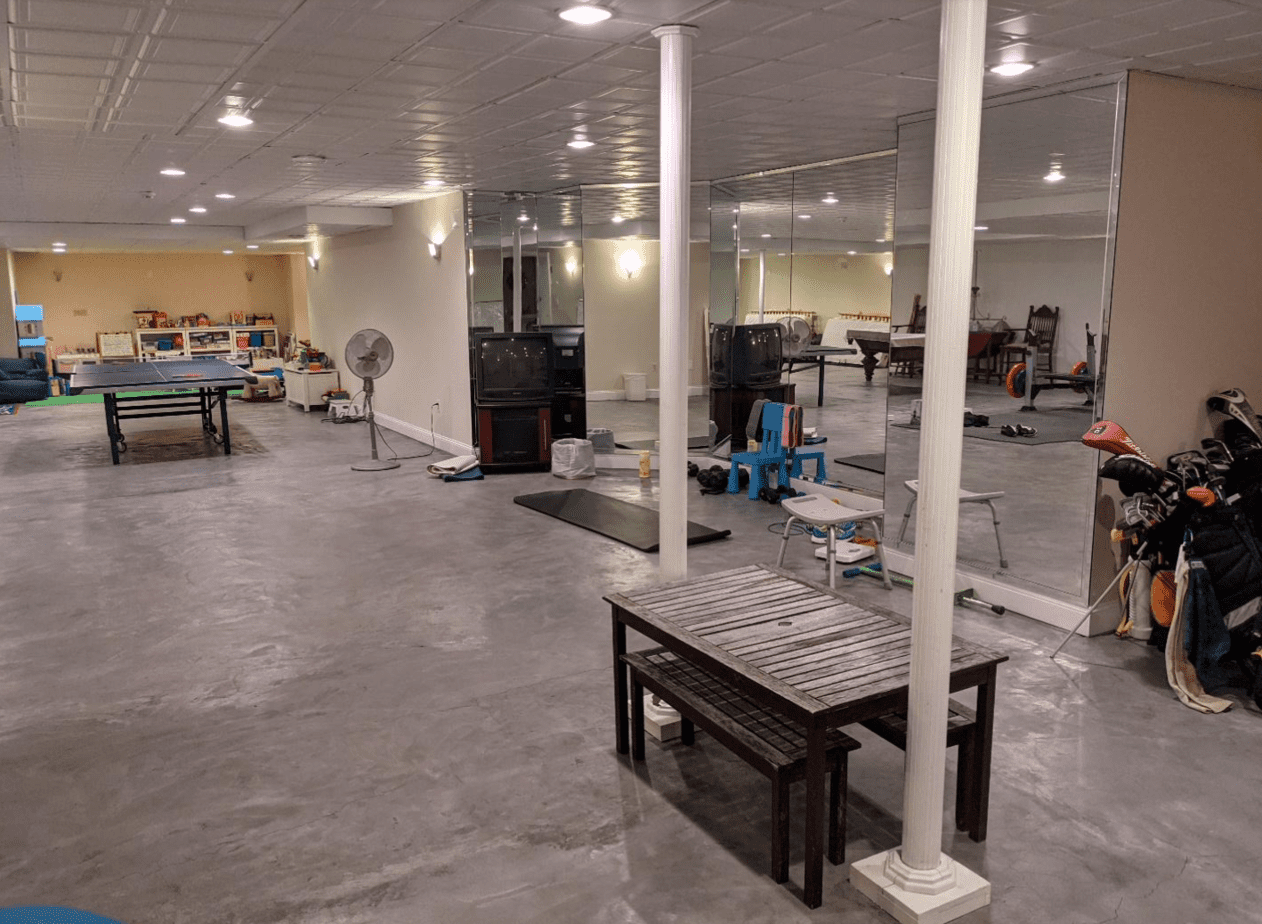
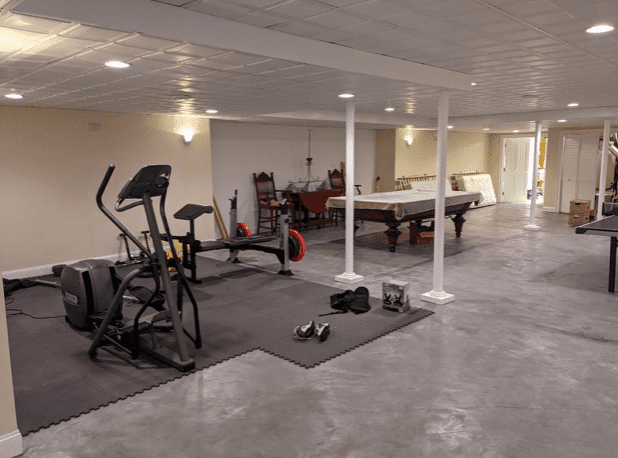
The space we started out with was pretty run of the mill for most basements. This basement was semi-finished with drywall already on most of the foundation walls, otherwise there was a concrete floor, lots of hard to use bi-folding doors to various mechanical spaces, drop ceilings and a big open space that was mostly unused. An old “playroom” space with old toys their children had outgrown occupied a large part of the space, an elliptical and some foam tile flooring created a small workout area. The generally very open unused space was dotted with some old furniture, a pool table and a ping pong table. Our client’s request was to add more functions to the space, such as a bar area for entertaining, with appliances to house snacks for teenage children, a small sink, and an oven to provide extra cooking capacity for holidays or large gatherings. They also wanted an area for the kids to play video games, utilize their billiards and ping pong tables, as well as expand the fitness area. The client had two old disassembled bunk beds from when the children were younger, and now they were interested in having a bunk bed setup for when the kids had friends staying over. Lastly, they wanted to add another doorway to the backyard giving access to the pool and outdoors.
Making it All Fit With an Open Concept
The client requested that we not close up the space into different rooms. How do we make an open concept space make sense with a gym, sauna, bar/kitchen, TV and games AND a bunk bed space? By thinking about flow, and creating unique “spaces” within the larger space through architectural details, and using colors to create a cohesive look, but still designating each area as its own unique space and function.
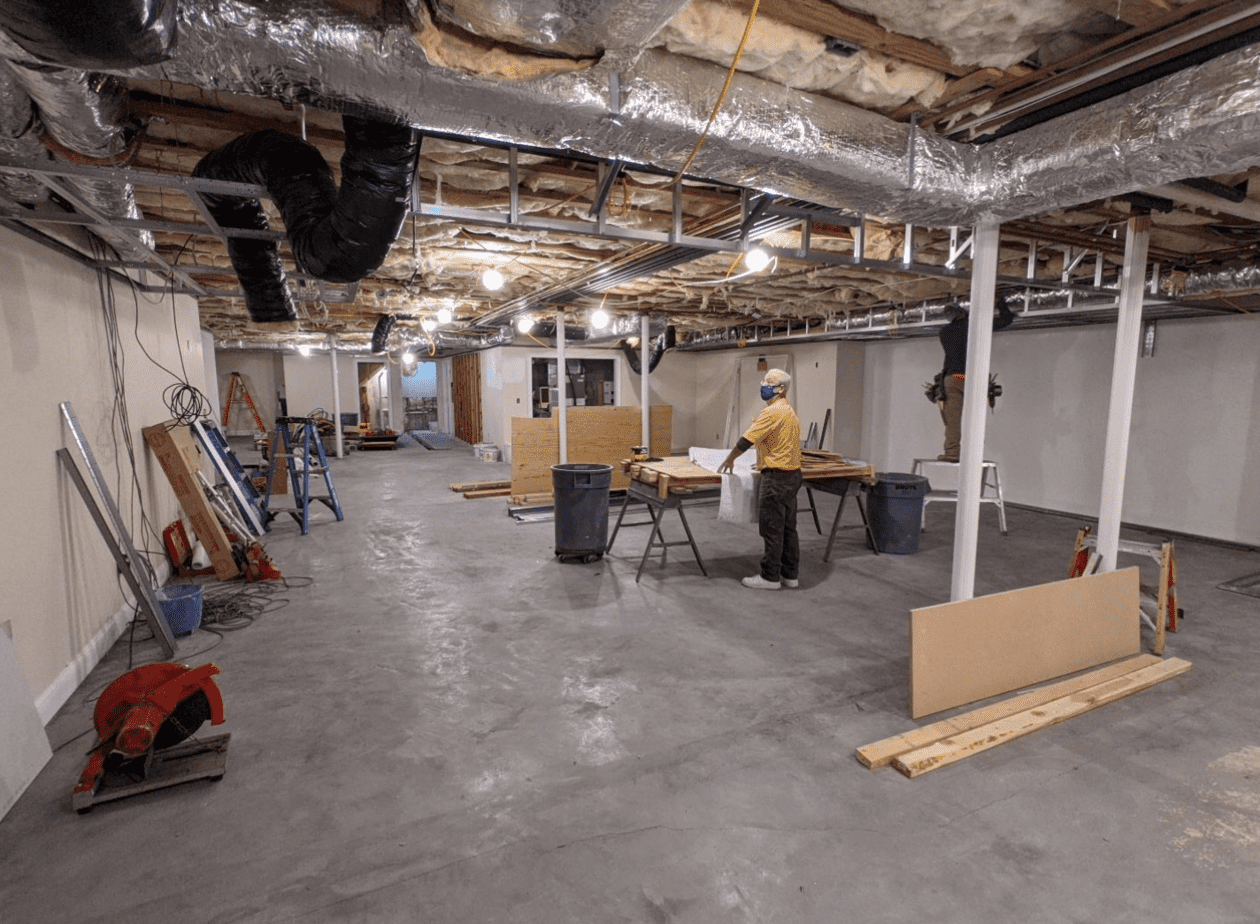
Basements are a beast of their own, with steel columns, mechanical spaces dotted throughout as they are needed for the living spaces above, and ductwork running sporadically in the already lower than normal ceilings. My first focus was to try and create a floorplan that made sense in terms of flow, keeping entertaining areas like the bar, games and TV area adjacent to each other, while also putting the gym, sauna and new full bath with a shower together. It’s not as inviting to have to walk through gym equipment to get to the bar and TV area, so the gym space went further away from the main traffic flow of the stairs. There were 2 steel columns in the area closest to the stairwell that we transformed from a structural eyesore into an architectural focal point, creating an entry into a bar but also defining the perimeter of the space, creating a large wrap around bar with tons for seating. There were lots of ducts and mechanicals running overhead in this area, the plan was to intentionally drop the ceiling where necessary and in other areas nearby, this created a visually cleaner space. We were able to drop the ceiling in the areas surrounding the entertainment space which then created a tray ceiling above where we added a light feature to make watching movies more cozy but also clearly demarcated the space as its own.
Before (left) and after (right) creating a confined “kitchen” space utilizing structural columns while still keeping it open for entertaining.
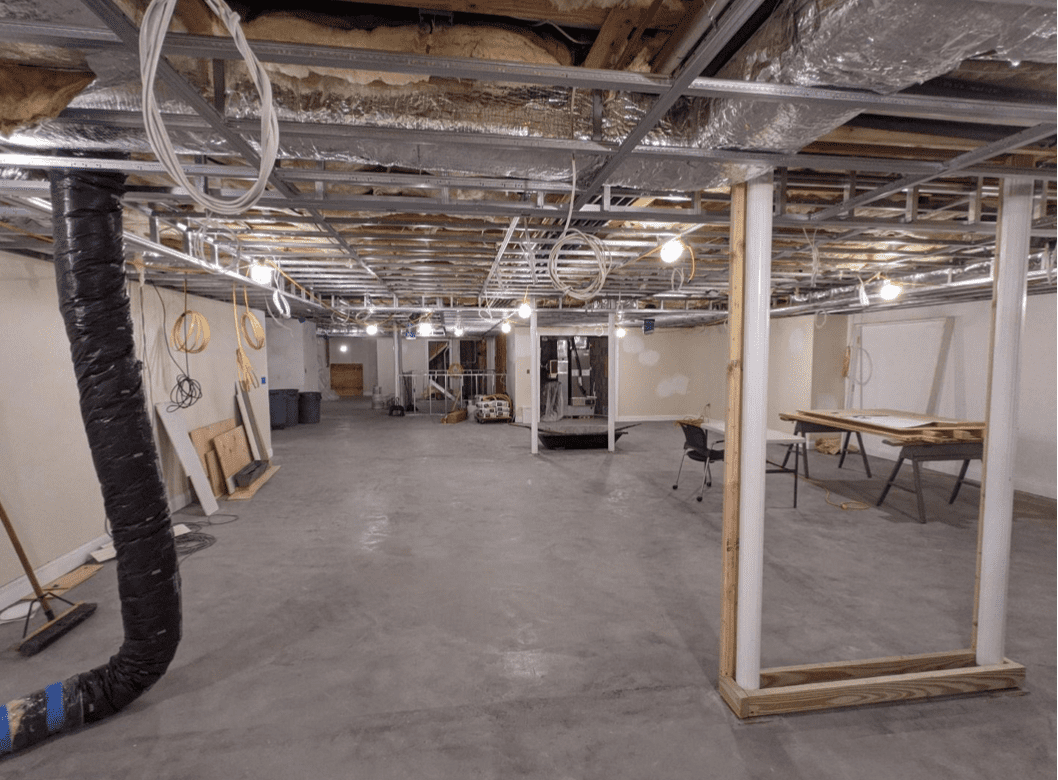
New steel framing is dropped to help conceal ductwork and build out the new tray ceiling in the entertaining area (left).
The Process
While we experienced a few expected hiccups from material shortages during the peak of the pandemic, the process was straightforward. Demolition, framing, installing the rough mechanicals – new electrical wiring, plumbing for the bathroom, then the walls were framed. At this time lumber was experiencing high shortages and costs were extravagant, Homesquare opted to use steel framing, which was more easily accessible and just as functional, allowing the project to run smoothly and within budget. Learn more about home remodels from one of our most experienced craftsman Don!
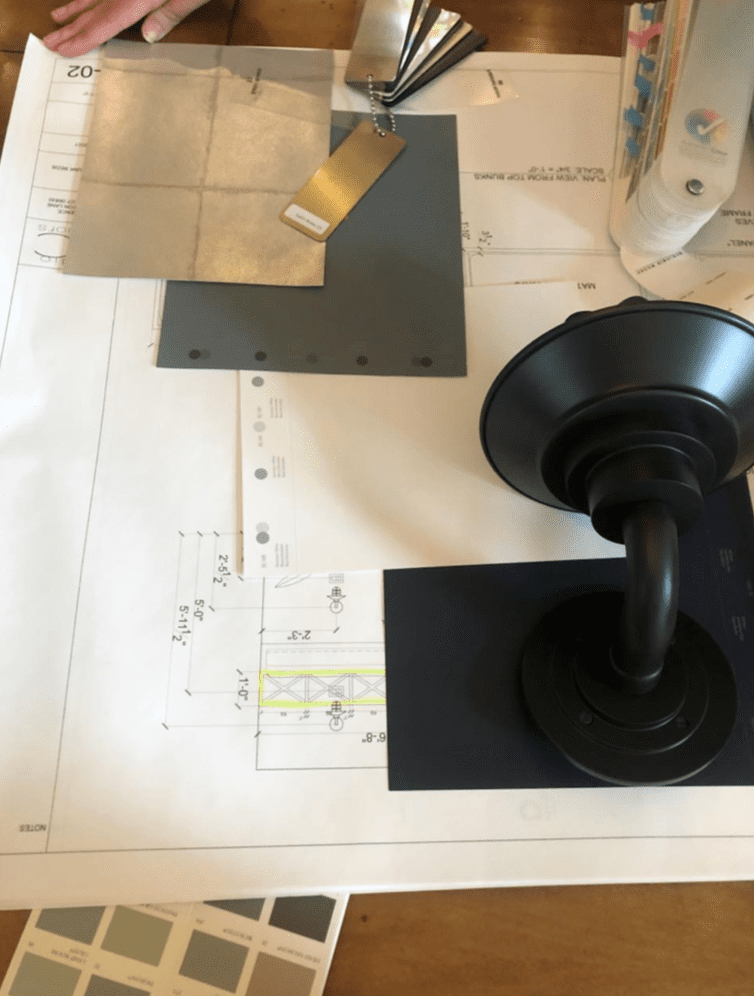
Periodically throughout the project we worked with the homeowner to help refine and make final selections for countertops, paint colors and cabinet hardware. As a designer it’s important for me to make sure we make these selections in a timely manner so the materials can be purchased and not delay the project. But also to allow the client to see the space come together as we make these decisions. It’s easier to select some of these finishes that aren’t needed until later in the process while the client can better visualize the area.
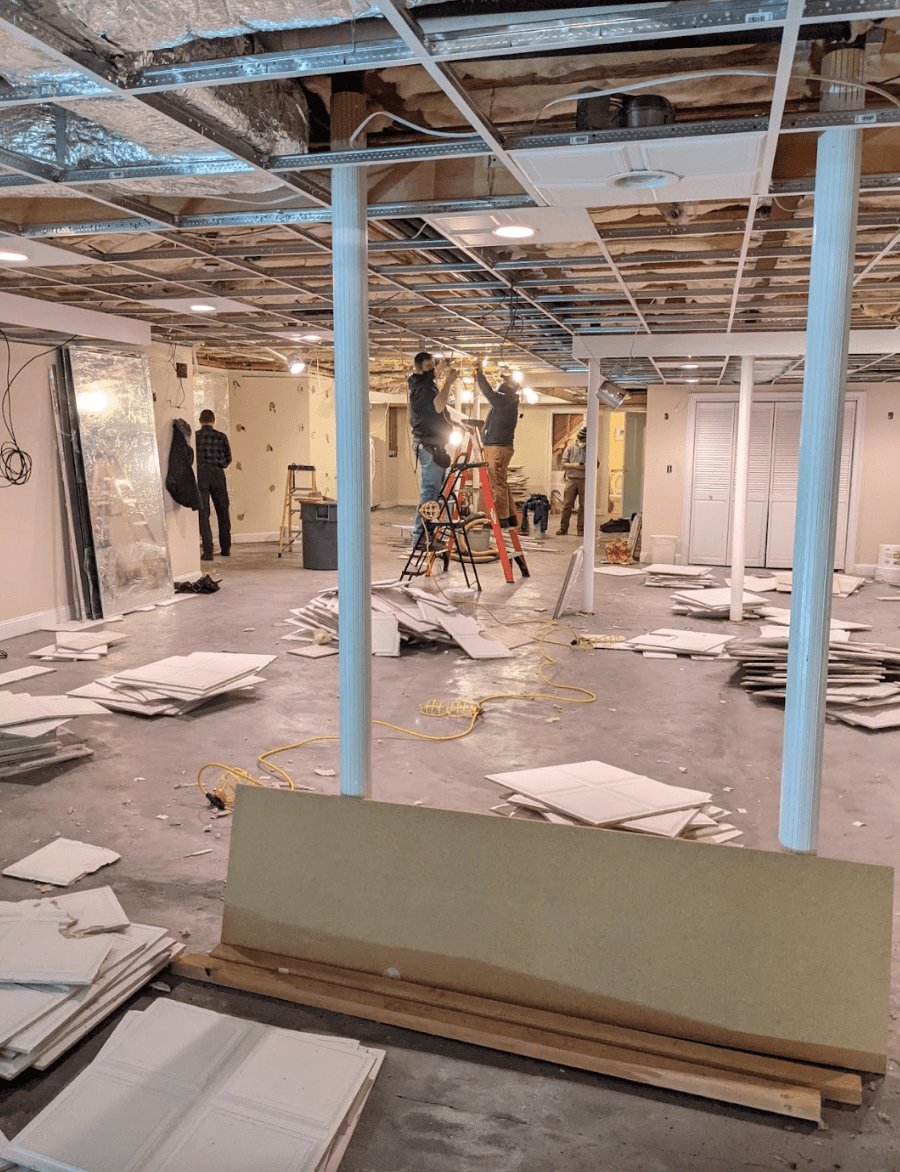
Demolition, bye bye dropped ceiling tiles! New framing for our ceiling, all the dangling wires are where new electrical was run for LED recessed lights and more.
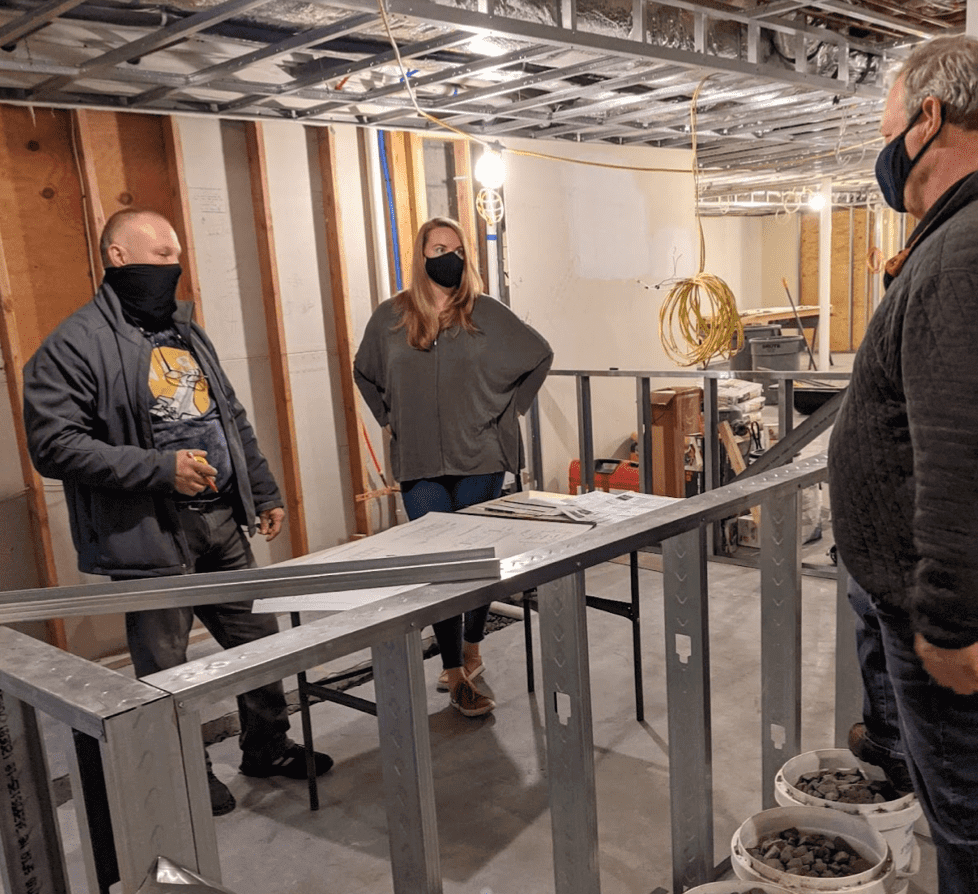
Site meeting with myself, the cabinet maker and Dan, our project manager from Homesquare, discussing plans for the new kitchen area.
Meeting with the client where we discussed paint colors. A desire to keep the basement from feeling like “a gray cloud” we opted for coastal New England colors, navy, white, soft neutrals and a blue gray. These colors created a soft cohesive palette, but each space would have it’s own unique feel. A mix of warm hardware finishes like brass and blackened bronze add a level of sophistication and warmth.
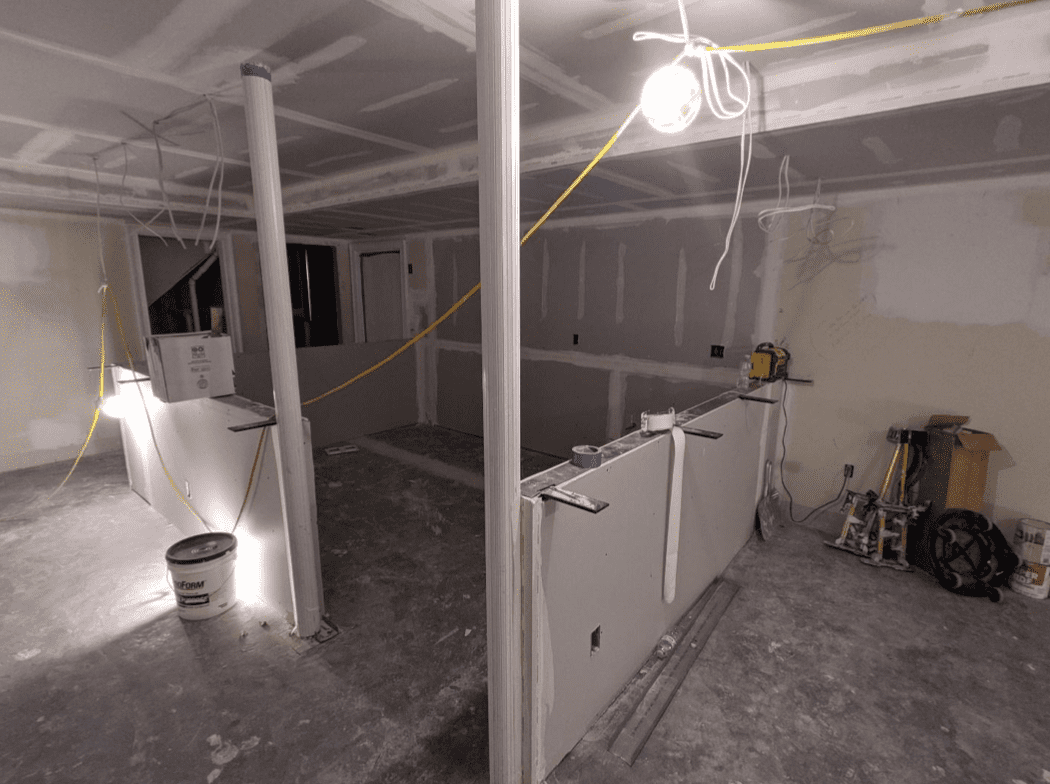
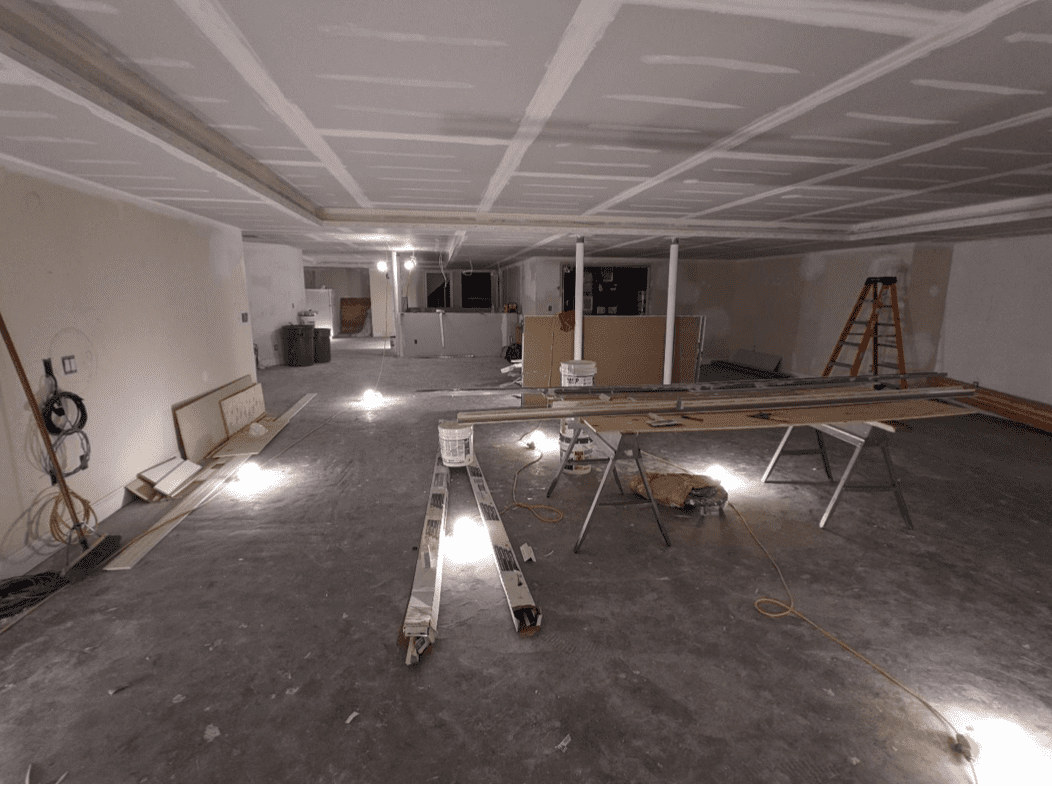
(Left) Our kitchen and bar area after sheet-rocking. The ceiling is finished and more organized, steel brackets are on the half wall to provide support for the countertop to overhang for seating. (Right) A view from the back of the space. Our ceiling is drywalled and creates a tray for our light feature over the entertainment area.
The Fun Stuff – Installation and Finishes
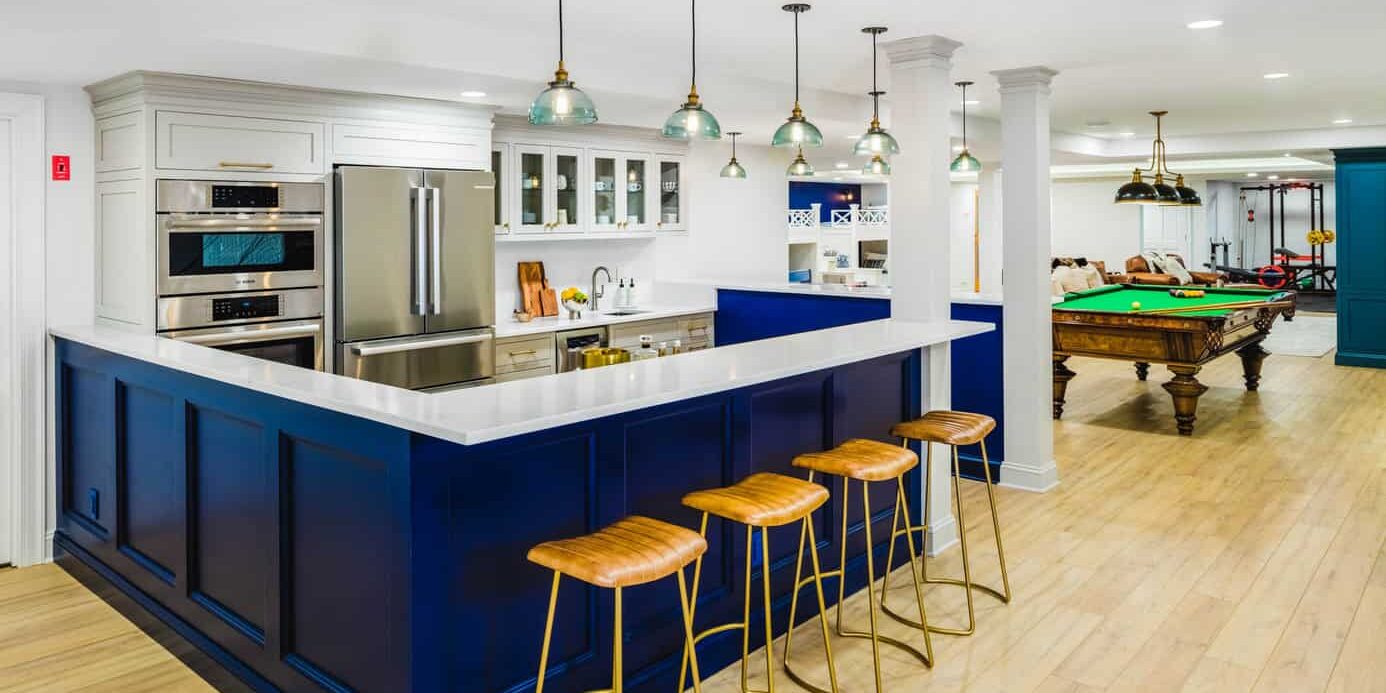
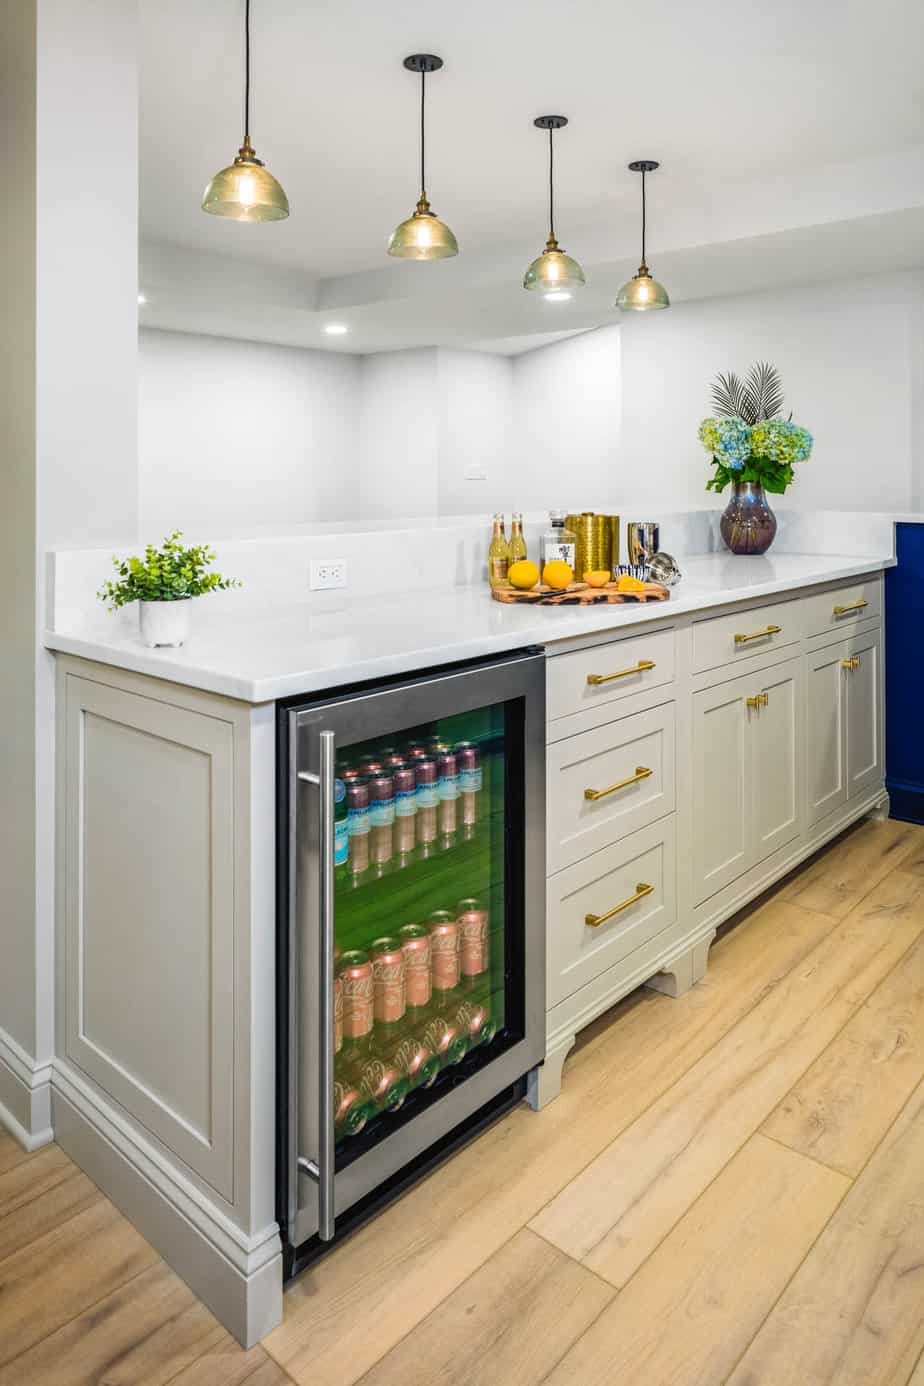
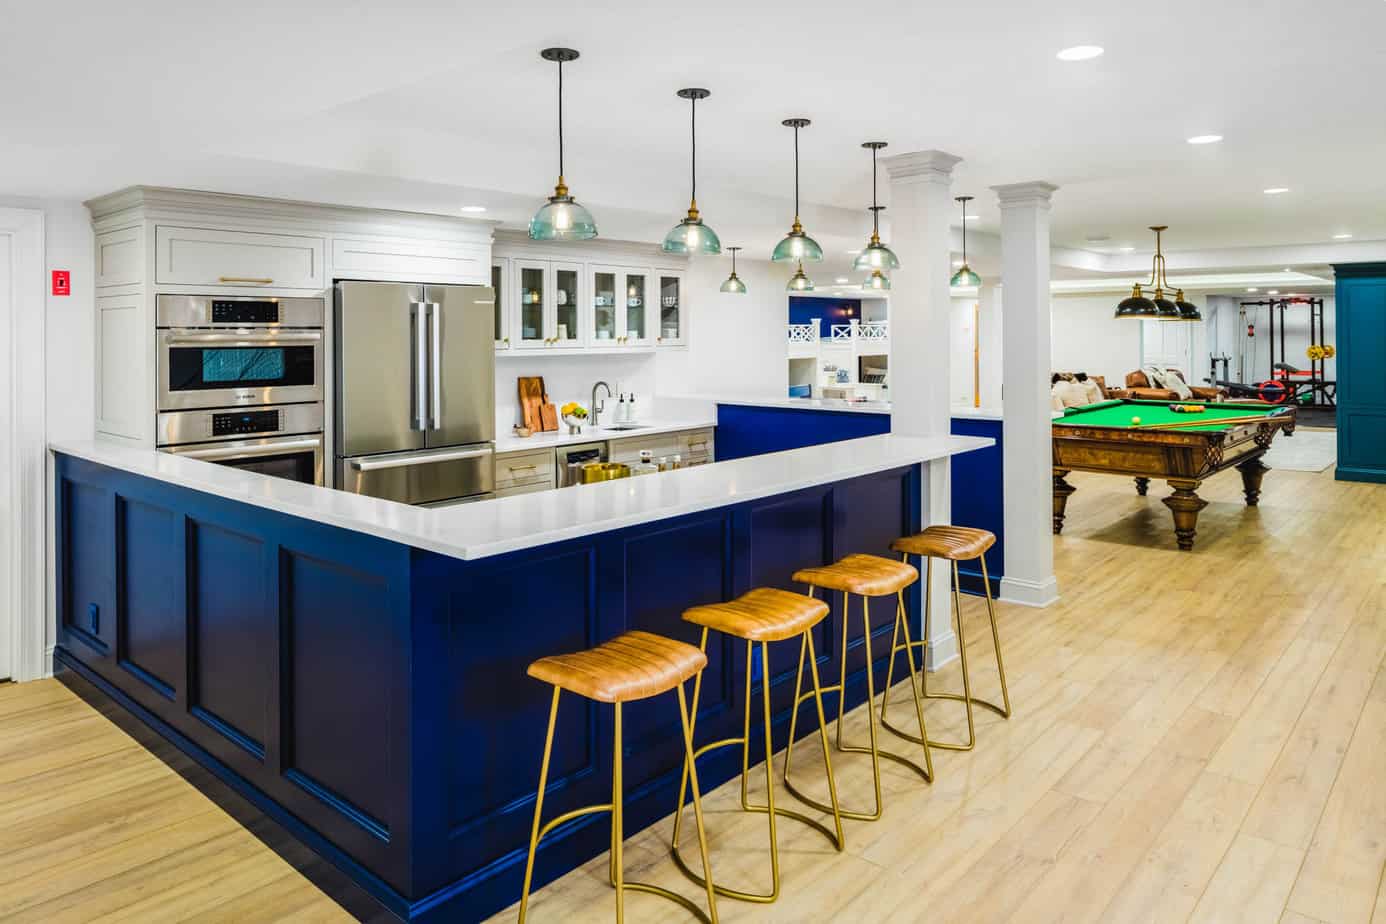
All in all, the space turned out tremendously. As you enter the space you’re greeted by an inviting bar and kitchen area. The perfect space to hang out and enjoy a snack and converse with people playing pool or ping pong, and still feel close by to the media area. The kitchen cabinets were painted an off white color that feels warm and less like more traditional white kitchen cabinets and more like a bar without feeling too dark. The steel columns were boxed out in millwork to make them look more substantial. The space is self sufficient with a sink, small dishwasher, full size fridge/freezer, beverage fridge, and wall oven. We even made one of the cabinet boxes the exact size and removable in the future should the client decide to also add a wine fridge or other 24” under-counter appliance without needing to damage the other cabinets! The seating area is bar height, 6” higher than a countertop so we created waterfall edges with a continuous quartz for a clean and beautiful look. Our client fell in love with a navy accent wall we did behind the bunk beds, so we ended up painting the paneling on the exterior of the bar area the same color for another pop.
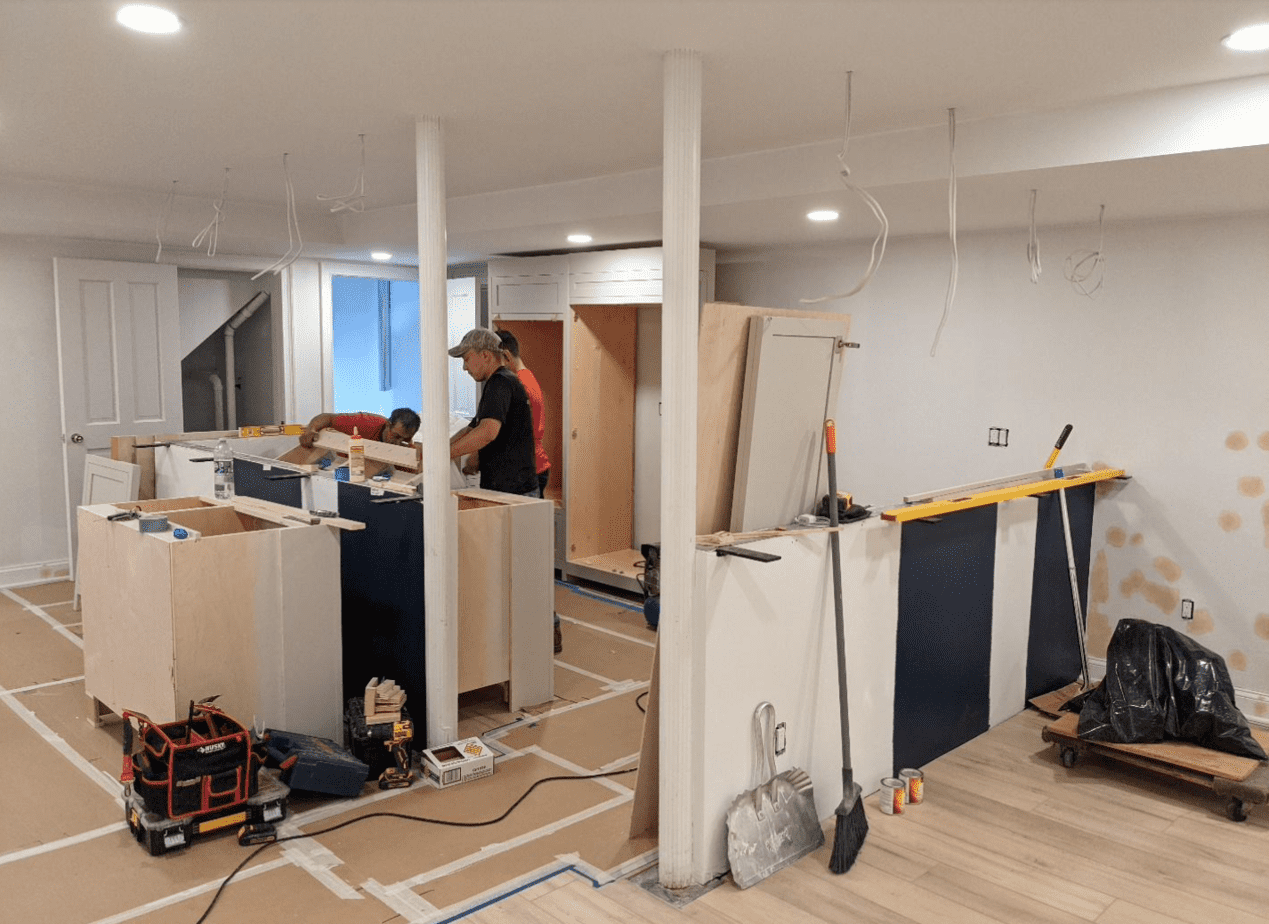
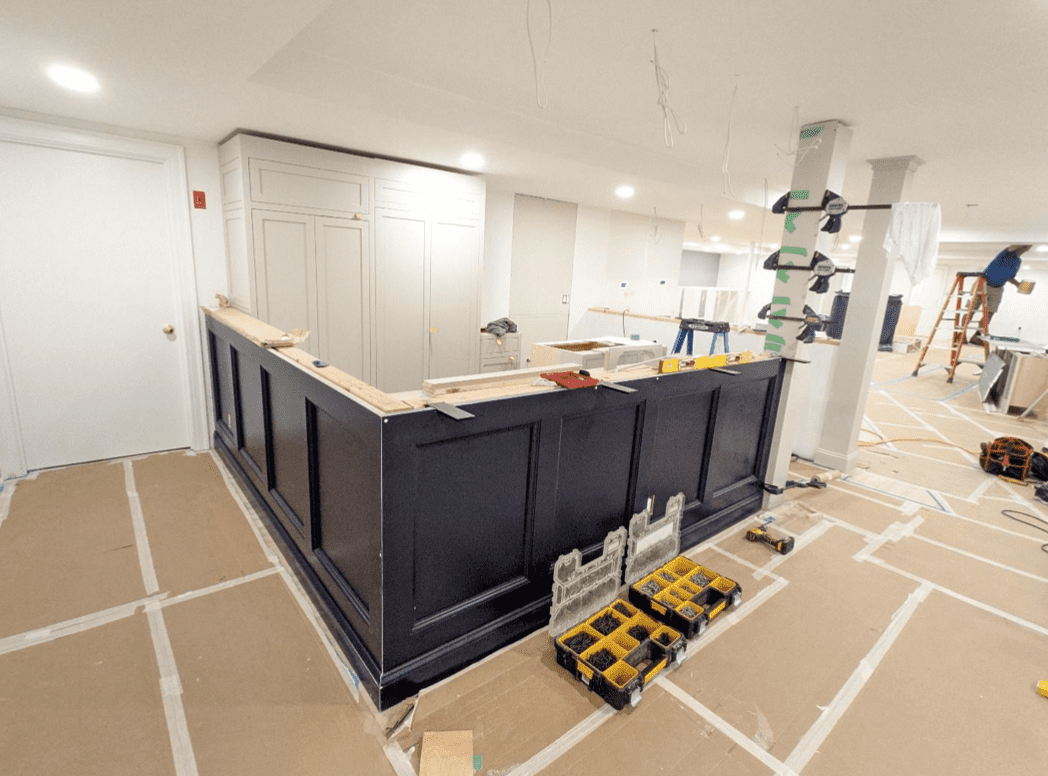
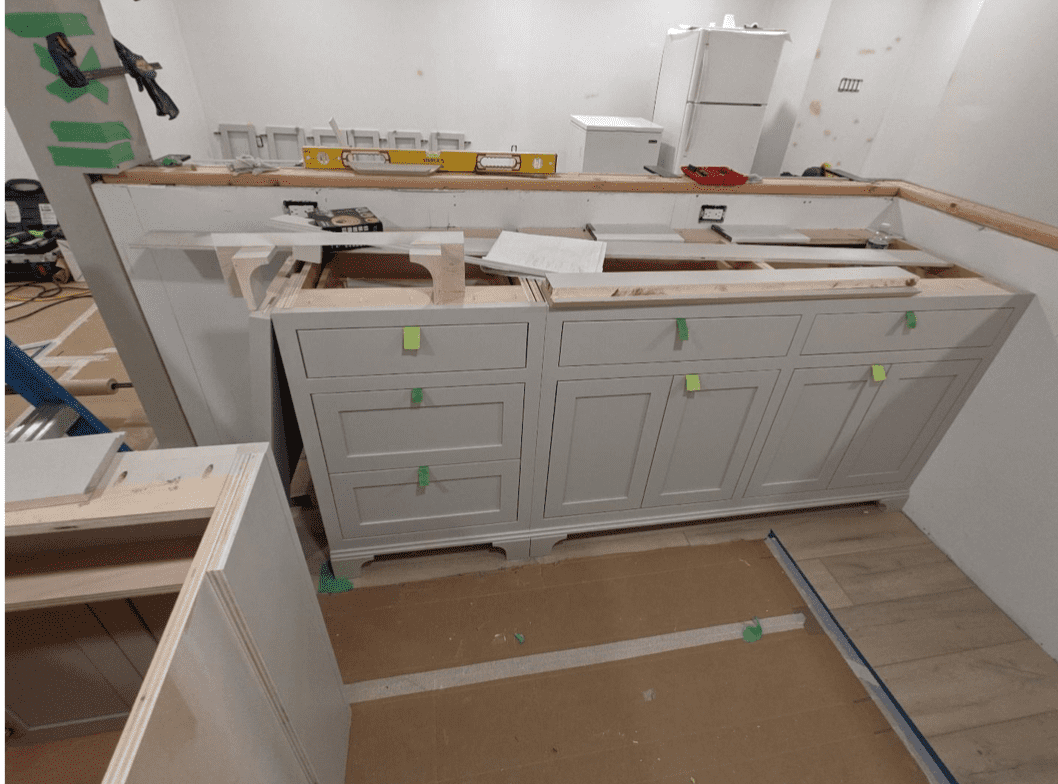
Clamps help secure the new wood boxes encasing the columns, creating a focal point from what was an eyesore. These are painted the same off-white as the kitchen cabinets. The other columns in the space were wrapped in the same material but painted white like the rest of the trim. Cabinetry installation, the small cabinet on the end was made detachable with electrical access behind if the client chose to ever add another appliance, such as a wine fridge for the space to transform from a teen space to more adult space.
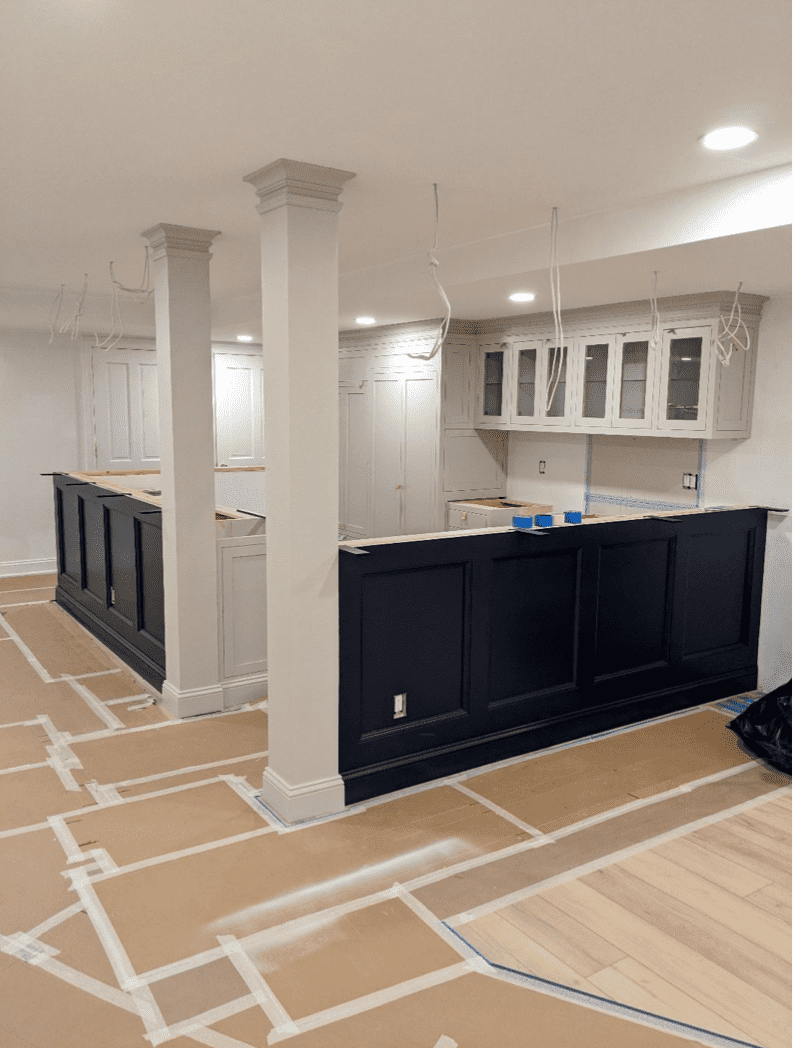
Beautiful installation! The wires are dropped for pendant lighting, which also help designate the space as its own. A view from behind the bar, finished with brass. You can see the waterfall detail of the countertops creates a continuous luxurious look. 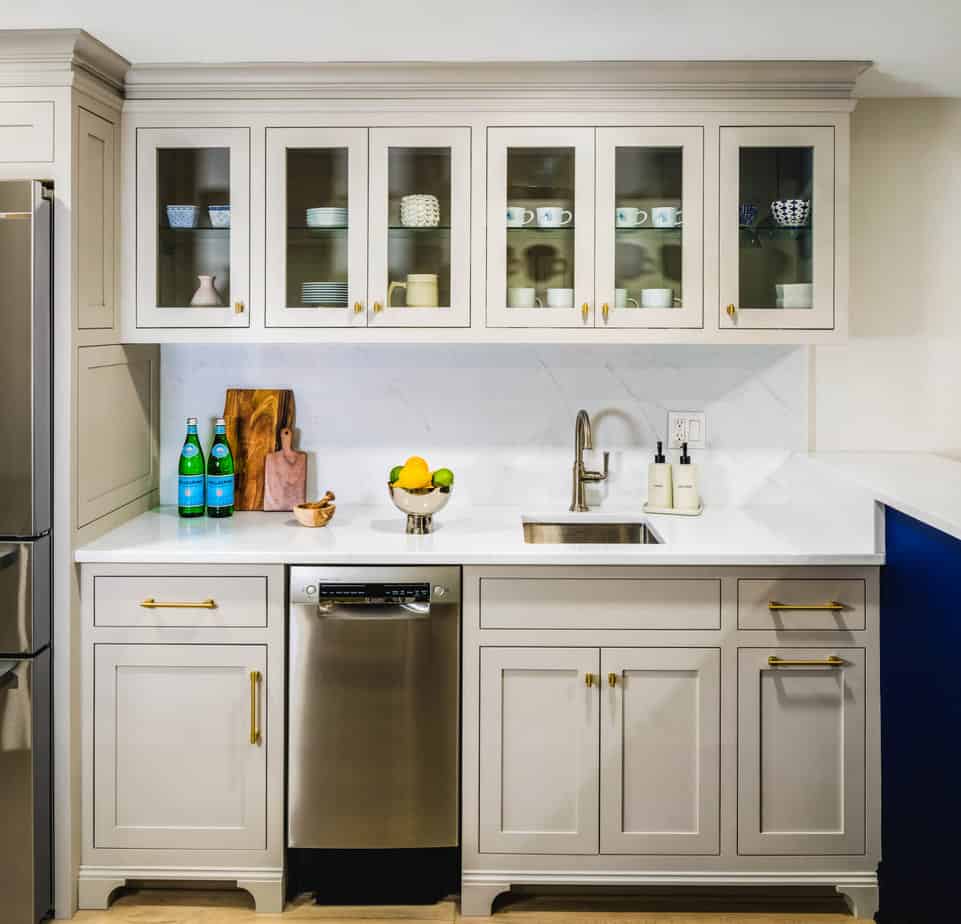
The very functional and attractive kitchen counter and cabinets.
We fit the billiards table and ping pong tables into open spaces that accommodated them well for play spaces. With enough room to extend a pool cue and step back to really play ping pong. The perfect space to straddle conversation from either the bar area or the media space, and be in the center of the action. It also encourages people to play the games rather than have them sit unused in a corner.
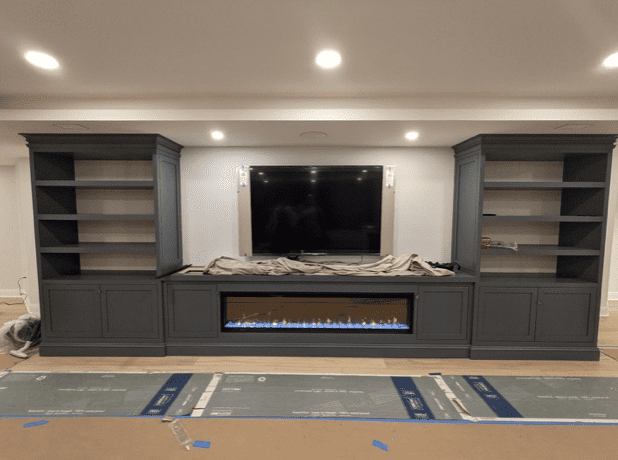
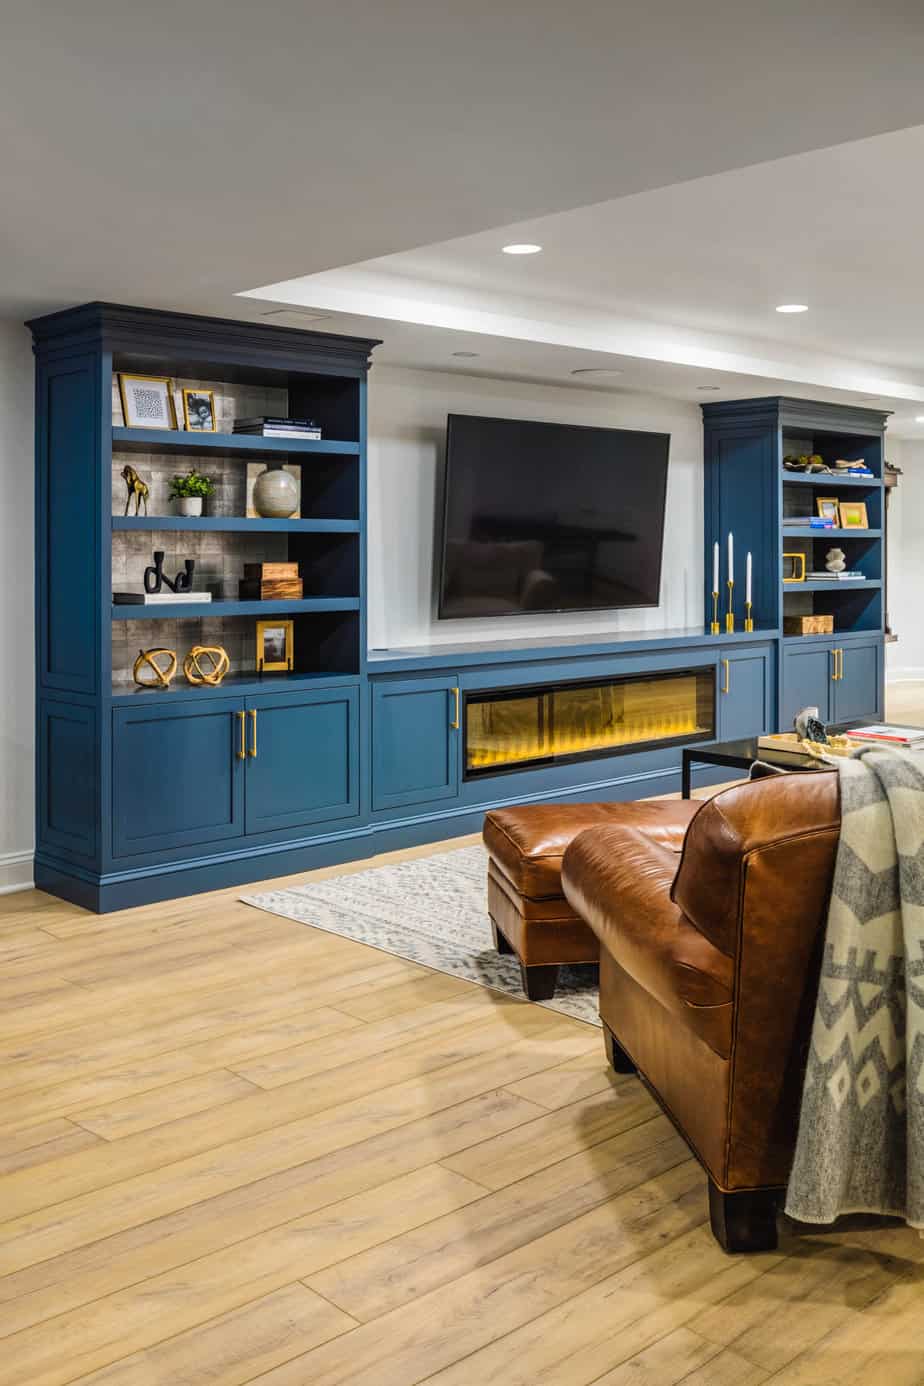
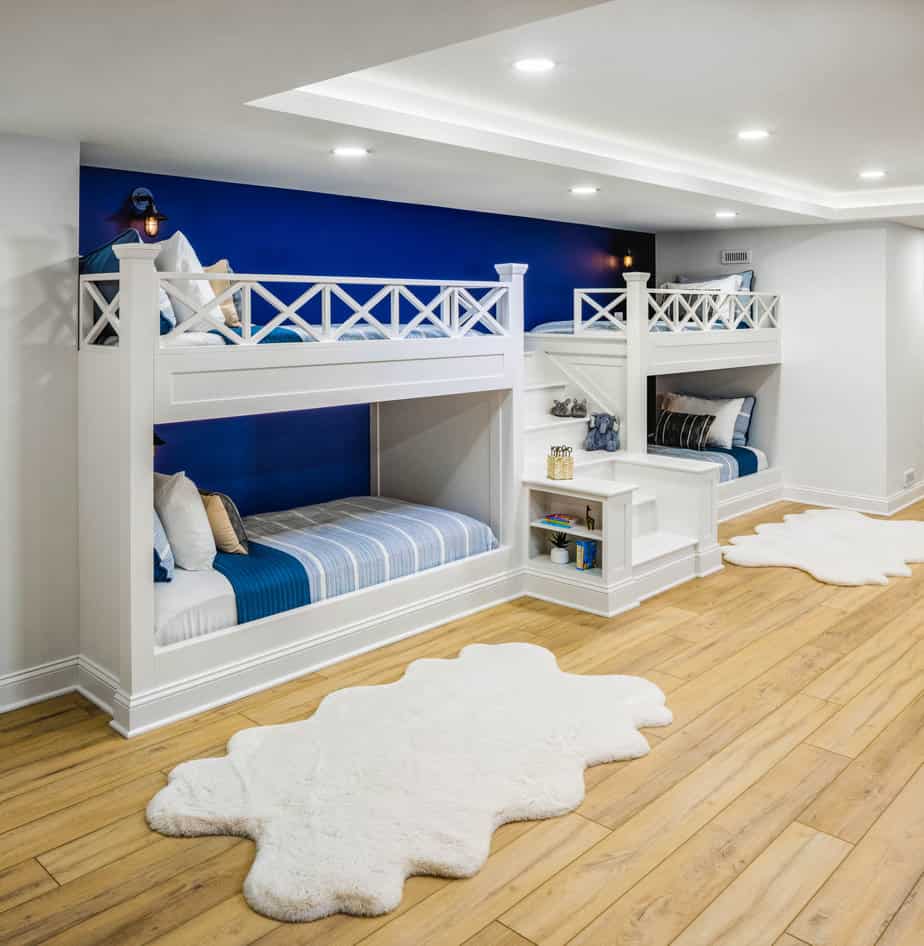
In the center of the space, where the tray ceiling was created, we built a long media cabinet to fill the large space, with plenty of storage for gaming consoles and storage, as well as display shelves. Below the TV is a linear electric fireplace with a variety of lighting settings and acts as a heater. The cabinetry was painted a beautiful blue-gray that ties in with the navy elements while still being distinct. The backs of the display shelves lined with a silver tea-paper inspired wall covering to add lightness and interest. The tray ceiling has a cove lighting feature that casts light upward to make a non-distracting glow for movies. Behind the media area are custom built-in bunk beds with a set of stairs between them to reach the higher bunks, and shelves. Perfect for watching movies from the bunks, and right next to the bathroom for convenience.
The media area during installation.
The finished product. I LOVE the way the brass hardware ties in the flames of the fireplace and contrasts against the cool tones of the cabinetry and silver on the shelves.
Each bed has its own sconce with a switch and an outlet. Perfect for charging a phone and enjoying a book. We decided to do a navy contrast wall behind to help pop the lattice detail of the bed rails up top and make everything feel extra cozy.
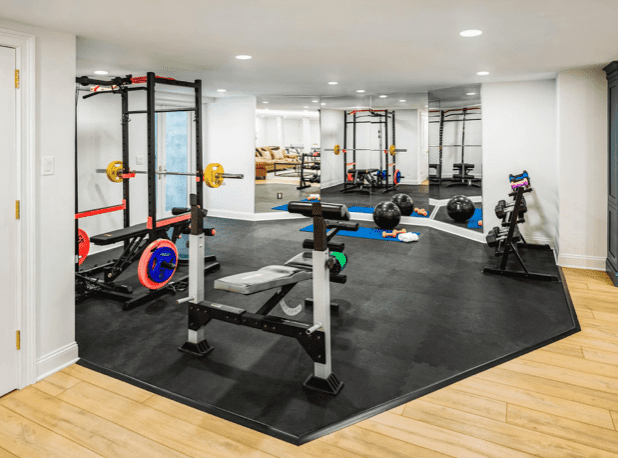
The fitness area before (left)…in the space where the ping pong table is now. The new and improved home gym. (right)
The fitness area, relocated and expanded, nicely designated in a corner past the media area by the new doorway to outside. Perfect if you need to crack the door for some extra air flow. Other benefits of having it tucked in this space are so that the required rubber flooring feels less intrusive and the mirrored walls where the foundation naturally bows out.
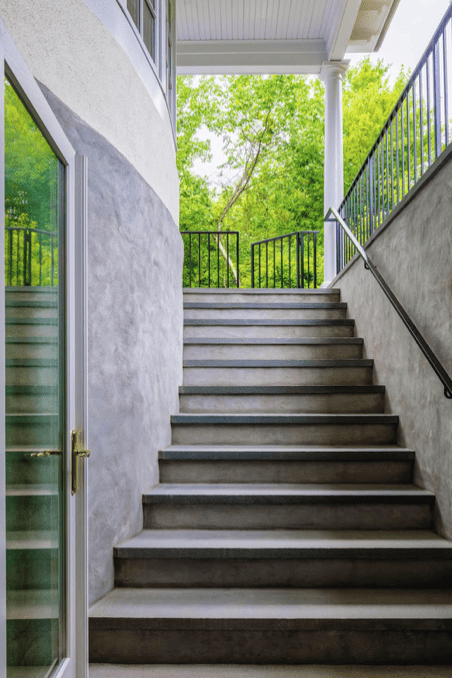
A view from the new doors to outside. With a basement project this large, the egress was required based on building code. This construction required the participation of all the mechanical subcontractors plus mason, excavator, carpenters, roofers, painters, metal fabrication, steel fabricator, concrete cutter, structural engineer, etc. which HomeSquare successfully managed.
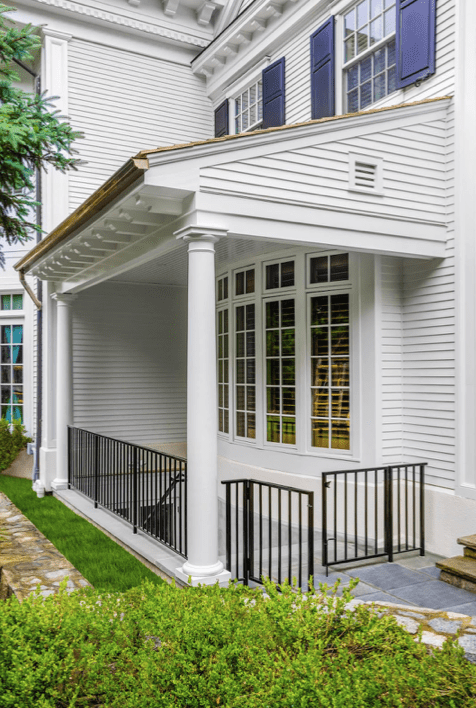
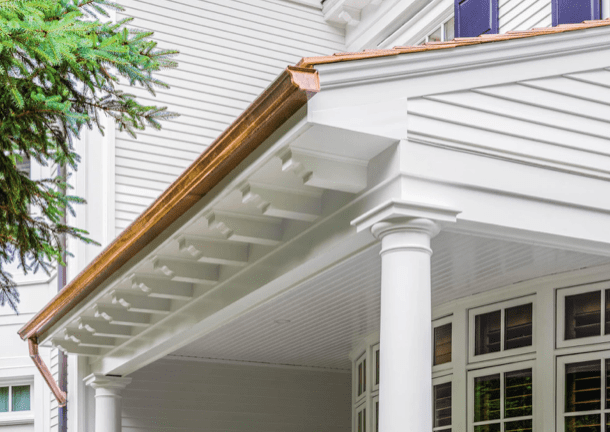
A view from outside to the new entryway and detail of the new copper gutters at the top of the stairs
The new full bathroom and sauna are also conveniently located, just across from the fitness area, next to the bunk beds, servicing both overnight guests and for a place to relax and shower after a workout. Check out some bathroom remodeling tips here!
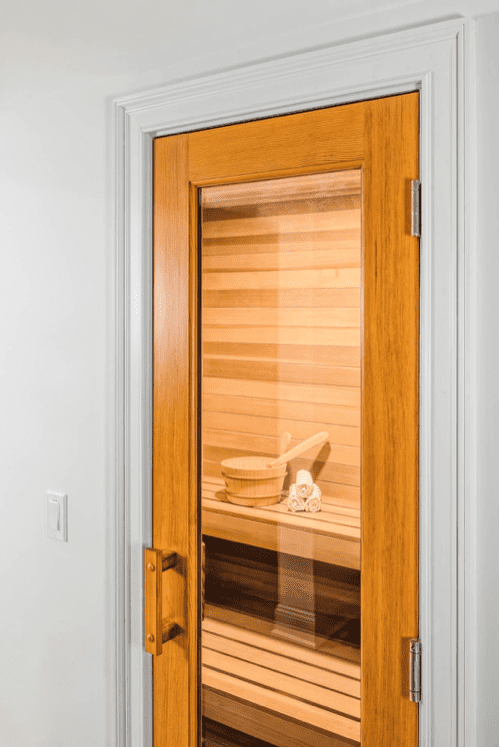
The sauna door, right next to the full bathroom, the wood and glass door invite you in to enjoy.
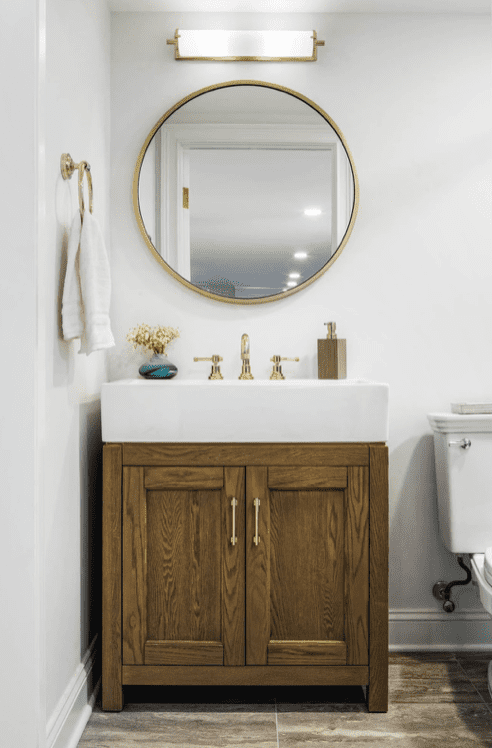
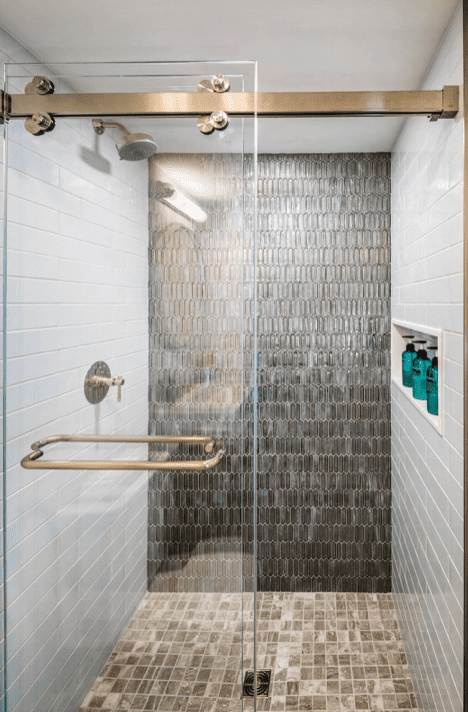
A view inside the bathroom of the vanity. And the shower in the new, full bathroom, with subway tile and shimmering glass accent tile, and a niche for toiletries.
All in all the basement provides invaluable additional square footage that service many different needs of the household without requiring an addition. All of the work was done while the family lived in the house, completely uninterrupted. Through clever use of materials, color, ceiling structure and using custom cabinetry, we were able to create different spaces with an open concept. Thoughtful space planning puts spaces that help service each other near one another, allowing people to connect with one another while doing different things. Tapping into untapped square footage like attics or basements in your home can give so much back to your home and your family. These investments are minor compared to an addition or purchasing a new larger home, but the return can be enjoyed both now in improving quality of life, as well as in adding resale value. If you are interested in a remodel or need a helping hand in your upcoming project, be sure to contact HomeSquare!
